A schema registry is a centralized repository that stores and manages data schemas. The schema registry ensures that producers and consumers agree on the structure of the messages. It allows producers to write data in a specific format (e.g. Avro or Protobuf) and register the schema in the registry. Consumers fetch the schema from the registry to deserialize and interpret the data correctly. In gradient fox you can conveniently view and manage subjects and schemas in your Schema Registry instances.
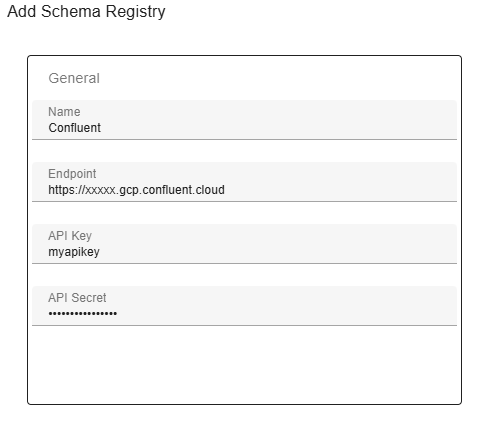
To add a connection to a schema registry, click on the Add button on the Schema Registry screen. This will bring up a dialog where you can enter the information needed to connect to your schema registry. If your schema registry instance is using Basic Authentication (optional) then you need to enter the basic auth username and password in the API Key and API Password fields, respectively.
After opening a Schema Registry instance, use the Config tab to view and update server-level configuration. The values shown on this tab are read directly from the Schema Registry server and updates are written back to Schema Registry, not to the gradient fox database. You can change the server compatibility level and mode using the drop-down fields and then click the Update button to apply the change.
If Schema Registry is in read-only mode, the compatibility level cannot be changed unless the mode is also changed to a writable mode as part of the same update. This prevents Schema Registry from rejecting the update while preserving the existing read-only behavior when no compatibility change is requested.
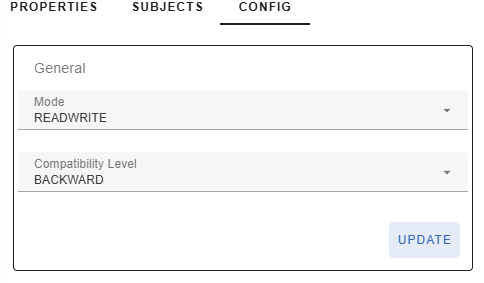
The Compatibility Level drop-down controls how Schema Registry validates new schema versions against existing versions of the same subject.
The Mode drop-down controls whether Schema Registry allows reads, writes, or imports.
After adding a schema registry instance, you can view its subjects by navigating to the Subjects tab. You will see a list of all subjects in a grid with additional details about each subject. You can expand each row by clicking on the arrow at the end of the row, which will display the latest schema version for that subject.
If you want to delete a subject including all its versions, click on the delete (trashcan) icon on the appropriate row.

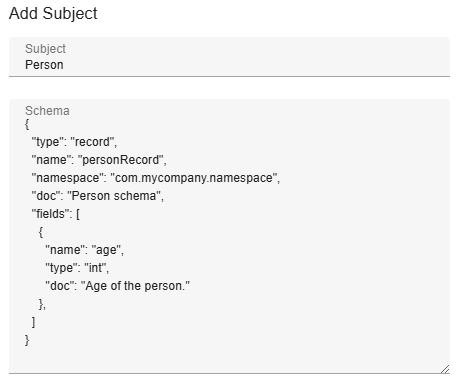
To add a new subject, click on the Add button on the subjects page. This will bring up a dialog where you need to enter relevant information about the subject you are about to create.
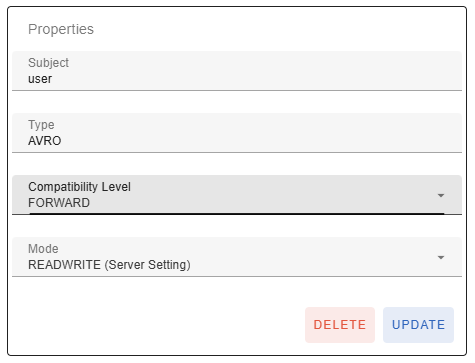
The subject details page is split into Properties and Schema tabs. The Properties tab contains subject-level settings: the read-only subject name, the read-only schema type, the subject compatibility level, and the subject mode. The subject name cannot be changed after the subject has been created.
The compatibility level and mode fields support all values allowed by Schema Registry. If either value is not defined at the subject level, the drop-down shows the current server setting and marks it as a server setting. Selecting Server Setting removes the subject-level override and lets the subject inherit the server-level configuration. Use the Update button on the Properties tab to apply subject configuration changes.
The Delete button on the Properties tab deletes the entire subject, including all of its versions.
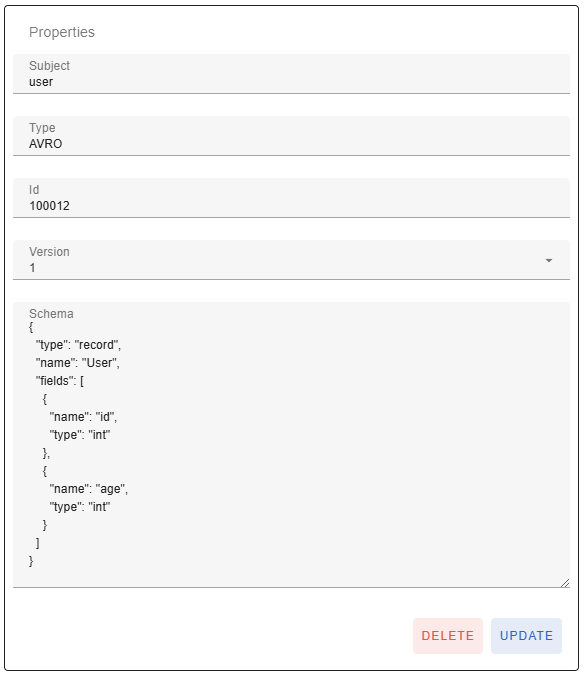
Evolving a schema in Schema Registry refers to making changes to an existing schema while maintaining compatibility with previously registered versions. This allows systems to adapt to new data requirements without breaking existing producers or consumers. In gradient fox you can evolve the schema on the Schema tab of the subject details page. The Schema tab shows the schema id, optional schema metadata such as GUID, Created timestamp and soft-deleted status, the Version drop-down, and the schema text area. The GUID is read-only. The Created and Soft Deleted fields are shown only when Schema Registry returns those values. Modify the schema text, for example by adding a new field, and then click the Update button on the Schema tab. This will create a new schema version and select it automatically in the Version drop-down. The Version drop-down lets you select and view any version of the subject in question.
If you want to delete a specific schema version of a subject instead of the entire subject, select the desired version and click the Delete button on the Schema tab.